


 English (English)
 Deutsch (German)
 Čeština (Czech)
 Italiano (Italian)
 Hrvatski (Croatian)
 Română (Romanian)
 български език (Bulgarian)
 Magyar (Hungarian)
 Español (Spanish)
 Français (French)
 Nederlands (Dutch)
 Polski (Polish)
 Slovenčina (Slovak)

Are you thinking about getting a plant for your home? One that you can legally grow and that will also be useful to you? How about chilli peppers. You may also know them dried, sold as cayenne pepper. This is an exotic plant grown mostly in Mexico, Japan, China, Vietnam, Africa and South and Central America. They are known for their sharp, hot taste, caused by the substance capsaicin. It has been proven that this substance is able to release endorphins, supports blood circulation, improves metabolism, and aids digestion.
It is also used in hospitals, where it is applied to a patient's skin before surgery and thereby eliminates post-operative pain. It also finds use in the treatment of thrombosis or varicose veins. Chilli peppers are rich in vitamin B and C. They also rank among the best-known aphrodisiacs thanks to their positive effect on libido.
Growing chilli peppers is simple, which is why we can grow them at home on a windowsill in a pot or on a balcony. In terms of size, they are low shrubs that don't need much space, and the real bonus is that we can grow them in just 70 days! As a true lover of hot and spicy food, you can show off a colourfully varied shrub with fruits of many different shapes.
So if you've decided to grow chilli yourself, let's take a closer look at what that involves. The first step is to get suitable seeds. There is a huge number of varieties, with more than 4,000 reportedly in existence. Among the hottest varieties you could include Naga Jolokia, Dorset Naga, Chilli "HP22B", Infinity Chilli Pepper or, for example, Naga Viper Pepper. Our shop offers a wide range of seeds, where you're sure to find the right one for you too.
And when should you start planting? If you plan to grow indoors, where artificial lighting can be used, you can practically start at any time. If, however, you're planning to move the plants outdoors, you need to take local climate conditions into account. It's therefore a good idea to start sometime in February, and by around July you can look forward to a great harvest. Before sowing, it's a good idea to check the seeds so as to increase the chance that only healthy seedlings emerge. If any seeds appear deformed, cracked, or show dark spots indicating disease, discard them.
Once we've chosen our seeds, the next step is germination. It's worth bearing in mind that the hotter the variety, the longer the germination time tends to be. What's essential for germination is warmth, moisture and enough oxygen.
Germination test
The germination test is a method for checking the viability of seeds. Before starting this test, it's a good idea to find out what germination requirements and time frame the chilli variety you've chosen needs. You'll need plenty of patience, since some varieties can take up to 6 weeks to germinate! So, we start by spreading several seeds on a damp paper towel (tissue). For a more accurate test, it's better to use more seeds. After spreading them on the towel, we cover the seeds with another sheet of damp towel and place them, for example, in a plastic bag to retain moisture.
We keep them warm, and after 5-10 days we check for sprouted seeds. Those we plant into soil, and the rest go back into the warmth. Germination rate is calculated as the percentage of seeds that sprouted out of all the seeds tested. If, over the following few weeks, no more seeds sprout, we can conclude that all the seeds that were viable have germinated during the test.
How to improve germination
There are several techniques that help achieve more successful germination. The most commonly used are chemical soaking and physical scarification. Physical scarification is a method in which the seed coat is weakened, damaged or removed before germination itself. It is most often carried out with a sharp knife. Soaking, or chemical scarification, involves softening the outer seed coat using tap water, weak tea, pigeon droppings, and also gibberellic acid (GA3).
The tea method
What makes this method work? It's precisely the tannins contained in tea that soften the seed coat. You don't need to buy any special tea either - any type of tea will do the job. Experienced growers advise that chamomile in particular works very well. This is mainly thanks to its antifungal effects (it reduces the risk of rot).
Here's how to proceed:
- 1) Boil water and steep a tea bag in it (this gives us a strong tea, but our goal is to get a weak brew. So we pour out the tea and steep the bag once more - now we have the desired brew)
- 2) Take a small plate, put a paper towel on it, then the seeds, and cover them with another towel. Pour on the tea so that the paper soaks up the liquid.
- 2) Take a small plate, put a paper towel on it, then the seeds, and cover them with another towel. Pour on the tea so that the paper soaks up the liquid.
- 3) Place it in a warm spot overnight
- 3) Place it in a warm spot overnight
Plenty of water is used during the germination process. However, we must keep in mind that growth is helped by moisture, but never by sogginess. Such an environment causes the seeds to die off and go mouldy. Temperature during germination is also an important factor. Ideally, it should be somewhere between 24 °C - 32 °C. Light is not that decisive during germination. Once germination is complete, it's time to plant into soil.
Soil
To grow really strong and healthy plants, it matters what soil you plant them in. Chilli peppers thrive in soil with a pH level around 6. The soil should be well-drained and aerated. That's why we add perlite or vermiculite, which ensures aeration. In practice, nowadays it's enough to go to a shop and buy a substrate intended for peppers or tomatoes, which supplies the plants with everything they need. When buying fertiliser, pay attention to what it supports - growth, flowering, or fruiting. The important elements chilli peppers require are: carbon, nitrogen, phosphorus, potassium, calcium, sulphur, manganese, magnesium, iron, copper, zinc, boron, chlorine, molybdenum.
What to watch out for
- 1) Make sure you don't plant the seeds too deep into the soil. This is because a seed contains nutrients meant for growth for only a limited time, so it could exhaust its energy and die before reaching the surface. Plant to a depth of 2-3 millimetres!
- 2) Choose only well-lit spots with as much sunlight as possible. Enough light is important for trouble-free ripening and affects the plants' overall vitality and resilience.
- 3) Since chilli is originally a subtropical and tropical plant, we should give it plenty of warmth. Prolonged low temperatures exhaust the plant and result in slowed growth. The ideal temperature is considered to be 35 °C.
- 4) Temperatures reaching more than 50 °C (achievable in an unventilated greenhouse) cause complications for the plants in the form of a halt to metabolic exchange in the leaves.
- 5) Water only with settled, lukewarm water (cold water causes a temperature shock to the plant)
- 6) don't overwater! Chilli doesn't like permanently waterlogged soil. During the growth period we try to keep the soil slightly moist, and as the fruit ripens we cut back on watering even further.
- 7) Diseases and pests can also appear, most often aphids, powdery mildew, and outdoors, slugs. So don't hesitate and take action against them in time.
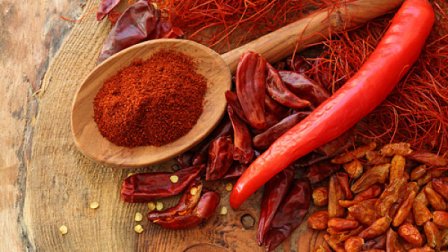
Once your peppers ripen, there's really no limit to how you can use them. Enthusiasts will surely know how to make the most of them, and for those who don't, we have a tip for two great chilli sauces.
Tabasco sauce - Whole peppers are blended, wine vinegar and salt are added until a thin liquid forms. For extra flavour, we add lime juice. Varieties suitable for this sauce are Naga Jolokia, habanero, tabasco, ... etc.
Sriracha sauce - the peppers are blended together with tomatoes from which the watery core has been removed, then mixed with ketchup. It's seasoned with garlic and lime juice.
Even though it might not seem like it at first glance, growing them is really simple. So if this has caught your interest, don't hesitate and give it a try. With us, you can choose seeds to suit your own taste.