


 English (English)
 Deutsch (German)
 Čeština (Czech)
 Italiano (Italian)
 Hrvatski (Croatian)
 Română (Romanian)
 български език (Bulgarian)
 Magyar (Hungarian)
 Español (Spanish)
 Français (French)
 Nederlands (Dutch)
 Polski (Polish)
 Slovenčina (Slovak)
In short: For about 100 ml of hemp salve you need 20 g of beeswax, 50 g of coconut oil and 30 ml of cold-pressed hemp oil. Melt the wax in a water bath, add the coconut oil and stir in the hemp oil only once the mixture has cooled to 45–50 °C. The salve then sets in 1–2 hours.
| Beeswax | 20 g |
|---|---|
| Coconut oil | 50 g |
| Hemp oil | 30 ml |
| Temperature for adding hemp oil | 45–50 °C |
| Setting time | 1–2 hours |
| Shelf life without preservatives | 3–6 months |
Why make hemp salve at home?
Homemade cosmetics are making a well-deserved comeback. You know exactly what you are putting on your skin, you control the quality of the ingredients, and the final product is clean, free of unnecessary preservatives or synthetic fillers. The hemp salve recipe we are presenting today is built on three carefully selected natural ingredients – beeswax, coconut oil and hemp oil. Together they create exceptional care that deeply nourishes, soothes and protects even the most sensitive skin.
Hemp oil is the real star of the whole recipe. It contains an ideal ratio of omega-3 and omega-6 fatty acids (approximately 1 : 3), which naturally resembles the composition of the skin's sebum. As a result, the skin absorbs the oil easily and benefits from its regenerating properties. Add the antimicrobial properties of coconut oil and the protective function of beeswax – and you have a salve that really works.
What you will need: ingredients and tools
Ingredients for approximately 100 ml of hemp salve
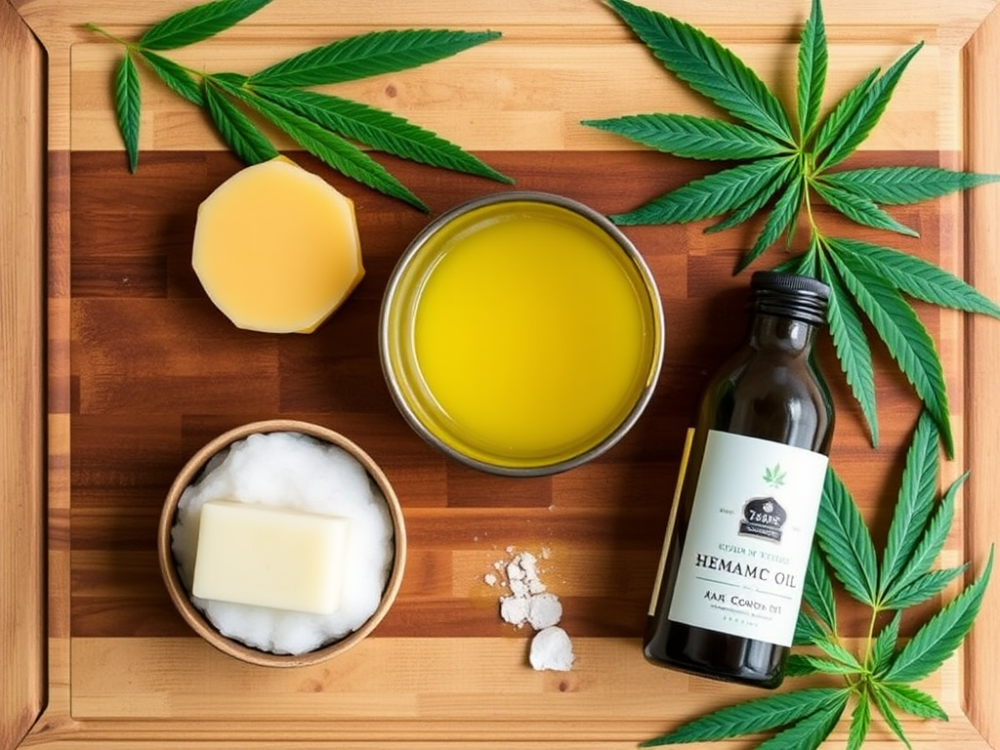
- Beeswax – 20 g (natural, ideally organic or from a local beekeeper)
- Coconut oil – 50 g (virgin, cold-pressed)
- Hemp oil – 30 ml (cold-pressed, unrefined)
- Essential oils to taste – e.g. lavender (10 drops), tea tree (5 drops) or mint (5 drops) – optional but recommended
Equipment
- A small pot and a larger pot or a glass bowl (for the water bath)
- Digital kitchen scale
- Thermometer (ideally a confectionery or infrared one)
- Glass or stainless steel stirring rod
- Small glass or aluminium jars with lids (total volume approx. 100 ml)
- Fine sieve or gauze (for filtering if needed)
Choosing ingredients: quality matters
Before you start making the salve, take a moment to choose your ingredients. The quality of the raw materials directly determines the effectiveness and shelf life of the final salve.
Beeswax
Beeswax acts as the binder in the salve – it determines its consistency and forms a protective film on the skin that prevents moisture loss. Look for natural yellow beeswax from local beekeepers or reputable natural cosmetics shops. Bleached white wax is aesthetically more neutral, but it has undergone chemical processing. If you want a lighter-coloured salve without using bleached ingredients, choose virgin yellow wax – the beautiful golden colour is a natural sign of quality.
Coconut oil
Coconut oil gives the salve a creamy texture and provides natural antimicrobial protection thanks to its lauric acid content. Always reach for virgin cold-pressed coconut oil – it retains both its scent and its valuable compounds. Refined versions are cheaper, but most of the benefits are lost during processing.
Hemp oil
The heart of the whole recipe. Hemp oil from industrial hemp seeds is rich in vitamin E, chlorophyll and the essential fatty acids mentioned above. Good-quality hemp oil is deep green to golden green in colour – the more intense the colour, the higher the content of beneficial substances. Store it in the fridge and buy it in smaller bottles, as unrefined oil has a shorter shelf life.
Hemp salve – step-by-step recipe
The whole process takes approximately 30–45 minutes and is not technically demanding. The key to success is patience and the right temperature.
Step 1: Preparing your workspace
Before you begin, get clean and dry equipment ready. Even a single drop of water in the salve can cause it to spoil quickly. Wash the jars beforehand, rinse them with hot water and let them dry completely – ideally put them in an oven preheated to 100 °C for a while so they are sterilised and thoroughly dried.
Step 2: Preparing the water bath
Pour approximately 3–4 cm of water into the larger pot and bring it to a gentle simmer. Place a glass bowl or smaller pot on top so that its bottom does not touch the water. This method of heating – a water bath (bain-marie) – ensures gentle, even warming without the risk of overheating the ingredients.
Step 3: Melting the beeswax
Put the measured beeswax into the bowl over the water bath. Heat it slowly, stirring occasionally. Beeswax melts at approximately 62–65 °C. Keep an eye on the thermometer so the temperature does not exceed 70 °C – at higher temperatures some of the beneficial components of the wax can be damaged.
Step 4: Adding the coconut oil
As soon as the wax has completely melted, add the coconut oil. Stir until both ingredients are perfectly combined. The mixture should be clear, golden yellow and smooth with no lumps. Its temperature should be around 60–65 °C.
Step 5: Adding the hemp oil
Now comes the most important moment. Take the bowl off the water bath and let the mixture cool a little – ideally to approximately 45–50 °C. Only then pour in the hemp oil and stir thoroughly. Why wait? Hemp oil is sensitive to high temperatures – adding it to a mixture that is too hot could degrade some of its valuable fatty acids and antioxidants.
Step 6: Adding essential oils (optional)
If you want to enrich the salve with essential oils, this is the right moment. The temperature of the mixture should be below 45 °C so the aromatic compounds do not evaporate. Recommended combinations:
- Lavender + chamomile – to soothe sensitive and irritated skin
- Tea tree + eucalyptus – for antibacterial support for problem skin
- Mint + camphor – for a cooling effect on sore muscles and joints
- Frankincense + ylang ylang – to regenerate mature and dry skin
Step 7: Filling the jars and setting
Carefully pour the finished mixture into the prepared jars. Do not rush – pour slowly so that no air bubbles form. Leave the jars standing at room temperature until the salve has completely set. Do not put the lids on until the salve is completely firm and cold – condensed steam could bring moisture into the salve.
Setting usually takes 1–2 hours at room temperature. If you want to speed up the process, you can carefully put the jars in the fridge – but be careful, a sudden change in temperature can leave the surface of the salve uneven.
How to store the salve properly
Store the finished hemp salve in a cool, dark place. Without added preservatives, it keeps for approximately 3–6 months when stored properly. Hemp oil oxidises faster than most other oils, so remember:
- Keep the salve away from direct light and heat.
- Always use a clean spatula or spoon – fingers carry bacteria into the jar.
- If the salve starts to smell unpleasant or changes colour, throw it away.
- In summer, it is better to keep the salve in the fridge – coconut oil melts at temperatures above 24 °C.
How to use hemp salve
Homemade hemp salve is versatile. Here are the most common ways to use it:
- Dry and cracked skin – apply a thin layer to the affected areas (heels, elbows, hands) and leave it to absorb overnight.
- Irritated skin after shaving – the salve soothes redness and irritation.
- Cuticle and nail care – regularly rubbing it into the nail bed supports healthy nail growth.
- Light massage of muscles and joints – combined with essential oils (mint, camphor), the salve warms and soothes tired muscles.
- Facial care – as a night cream for dry and normal skin, in a minimal amount.
FAQs and tips for a perfect result
The salve is too firm – what can I do?
If the finished salve is too firm for your use, next time reduce the amount of beeswax by 2–3 g or slightly increase the proportion of coconut oil. The consistency also depends on the ambient temperature – in summer the salve will naturally be softer, in winter firmer.
The salve is too runny
In that case, melt the salve again in a water bath and add a little more beeswax (1–2 g). Once it sets again, it will have a firmer consistency.
Can I use other oils?
Of course. Coconut oil can be partly replaced with shea butter for an even creamier texture, or with almond oil for a lighter feel on the skin. We recommend keeping hemp oil as the main active ingredient – it is precisely its composition that makes this salve an exceptional product.
Is the salve suitable for children?
The base of the salve (wax, coconut and hemp oil) is generally safe for children's skin. However, if you add essential oils, be careful – most essential oils are not recommended for children under 2 years of age, and some (such as eucalyptus or mint) call for extra caution even with older children. Consult a doctor before using it on children's skin.
Conclusion: homemade hemp salve as a gift to nature and to yourself
Making homemade hemp salve is a joy – a quiet moment in the kitchen, the scent of natural ingredients and, at the end, a product you can be proud of. Three simple ingredients, thirty minutes of work, and the result is a salve that rivals expensive pharmacy cosmetics. Hemp salve made with this recipe is a great start for anyone who wants to dive into the world of natural cosmetics.
Try the recipe, play with the ratios and tailor the salve exactly to your needs. Share your results and remember – the best cosmetics are the ones whose ingredients you know by heart.
You might also be interested in: Moon Rocks – the strongest form of cannabis