Own chili peppers in a pot
Are you thinking about getting a small plant for your home? One that you can legally grow and even benefit from? How about chili peppers. You might know them dried as cayenne pepper. This is an exotic plant mostly cultivated in Mexico, Japan, China, Vietnam, Africa, and South and Central America. They are characterized by a spicy and sharp taste caused by the substance capsaicin. It has been proven that this substance has the ability to release endorphins, promotes blood circulation, improves metabolism, and supports digestion.
They are also used in hospitals, where they are applied to the skin before surgery to eliminate post-operative pain. They are also used in treating thrombosis or varicose veins. Chili peppers are rich in vitamins B and C. They are also among the most famous aphrodisiacs due to their positive influence on libido.
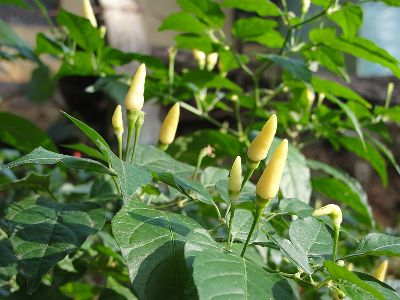
Growing chili peppers is easy, so we can grow them at home by the window in a pot or on the balcony. They are smaller bushes that don't require much space, and what's really great is that we can grow them in 70 days! As a true lover of spicy and hot foods, you can be proud of a bush with diverse colors and differently shaped fruits.

If you've decided to grow chili peppers yourself, let's look at what it involves. First, you need to get suitable seeds. There are countless varieties, with more than 4,000 reported. Among the hottest varieties are Naga Jolokia, Dorset Naga, Chili "HP22B", Infinity Chili Pepper, or Naga Viper Pepper. Our online store offers a wide range of seeds where you'll surely find the right one.
When should you start planting? If you want to grow indoors with the possibility of artificial lighting, you can practically start anytime. However, if you're considering moving them outside, you need to consider local climate conditions. It's suitable to start around February, and you can expect a fantastic harvest around July. Before planting, it's advisable to check the seeds to increase the chance of only healthy seedlings growing. If you find deformed, cracked, or seeds with dark spots indicating disease, discard them.
So we've selected seeds, and the next step is germination. However, you need to consider that the spicier the variety, the longer the germination time. Warmth, moisture, and sufficient oxygen are essential for germination.
Germination Test
The germination test is a method of checking seed viability. Before starting this test, it's good to find out the germination requirements and time needed for the chili peppers you've chosen. You need to have patience, as some varieties can take up to 6 weeks to germinate! Start by spreading several seeds on a damp paper towel. For a more accurate test, use more seeds. Cover the seeds with another damp paper towel and place them in a plastic bag to maintain moisture.
Keep them warm and after 5-10 days, check the sprouted seeds. Plant those in soil and return the rest to warmth. Calculate germination as the percentage of seeds that sprouted out of all tested seeds. If no more sprout in the following weeks, you can conclude that all viable seeds have germinated during the test.
How to Improve Germination
There are several techniques that help achieve more successful germination. The most used are chemical soaking and physical scarification. Physical scarification is a method where the seed coat is weakened, damaged, or removed before germination. It is most often done with a sharp knife. Soaking or chemical scarification involves softening the seed coat using tap water, weak tea, pigeon droppings, and gibberellic acid (GA3).
Tea Method
What contributes to the success of this method? It's the tannins in tea that soften the seed coat. You don't need to buy any special tea; all tea types will do. Experienced growers advise that chamomile is particularly good, especially due to its antifungal properties (reducing the chance of rotting).
The procedure is as follows:
- 1) Boil water and pour it over a tea bag (to get a strong tea, but our goal is a weak infusion. So pour out the tea and pour over the bag again (now we have the desired infusion))
- 2) Take a plate, place a paper towel, then seeds, and cover with another towel. Pour tea so the paper is saturated.
- 3) Place in a warm place overnight
Water is extensively used during the germination process. However, we must remember that growth is supported by moisture, but definitely not wetness. Such an environment causes seed death and molding. Temperature is also an important factor during germination. It should ideally be between 24°C - 32°C. Light is not as crucial during germination. After germination, planting in soil begins.
Soil
To grow truly strong and healthy plants, the soil is important. Chili peppers thrive in soil with a pH level around 6. The soil should be well-draining and aerated. Therefore, add perlite or vermiculite to ensure ventilation. Nowadays, you can simply go to a store and buy substrate designed for peppers or tomatoes to provide everything the plants need. When buying fertilizer, check what it supports - growth, flowering, or fruiting. Important elements that peppers require are: carbon, nitrogen, phosphorus, potassium, calcium, sulfur, manganese, magnesium, iron, copper, zinc, boron, chlorine, molybdenum.
What to Watch Out For
- 1) Be careful not to plant seeds too deep in the soil. The seed contains nutrients for a limited growth period, and it might exhaust its energy before reaching the surface. Plant at a depth of 2-3 millimeters!
- 2) Choose well-lit locations with the longest possible sunlight. Sufficient light is important for trouble-free ripening and affects the overall vitality and resilience of plants.
- 3) Since chili is originally a subtropical and tropical plant, provide it with plenty of heat. Prolonged low temperatures exhaust the plant and result in slower growth. 35°C is considered the ideal temperature.
- 4) Temperatures reaching over 50°C (achievable in an unventilated greenhouse) cause complications by stopping metabolic processes in the leaves.
- 5) Water only with settled, lukewarm water (cold water causes thermal shock to the plant)
- 6) Don't overwater! Chili doesn't like permanently wet soil. During growth, try to maintain slightly moist soil, and reduce watering even more during ripening.
- 7) Diseases and pests can appear, most commonly aphids, powdery mildew, slugs outdoors. So don't hesitate and act against them promptly.

When the peppers ripen, the possibilities for using them are endless. Lovers surely know how to use them, and for those who don't, we have a tip for two good chili sauces.
Tabasco Sauce- Blend whole peppers, add vinegar with salt until you get a thin liquid. For seasoning, add lime juice. Suitable varieties include naga jolokia, habanero, tabasco, etc.
Sriracha Sauce- Blend peppers with tomatoes (remove watery core) and mix with ketchup. Season with garlic and lime juice.
Although it may not seem so at first glance, growing is actually quite simple. So if this has piqued your interest, don't hesitate and try it. You can choose seeds to your taste in our store.